Unlock this content with a Rosendale Online subscription.
Get unlimited access to all of Rosendale Online.
Already a Rosendale Online member?
Log in
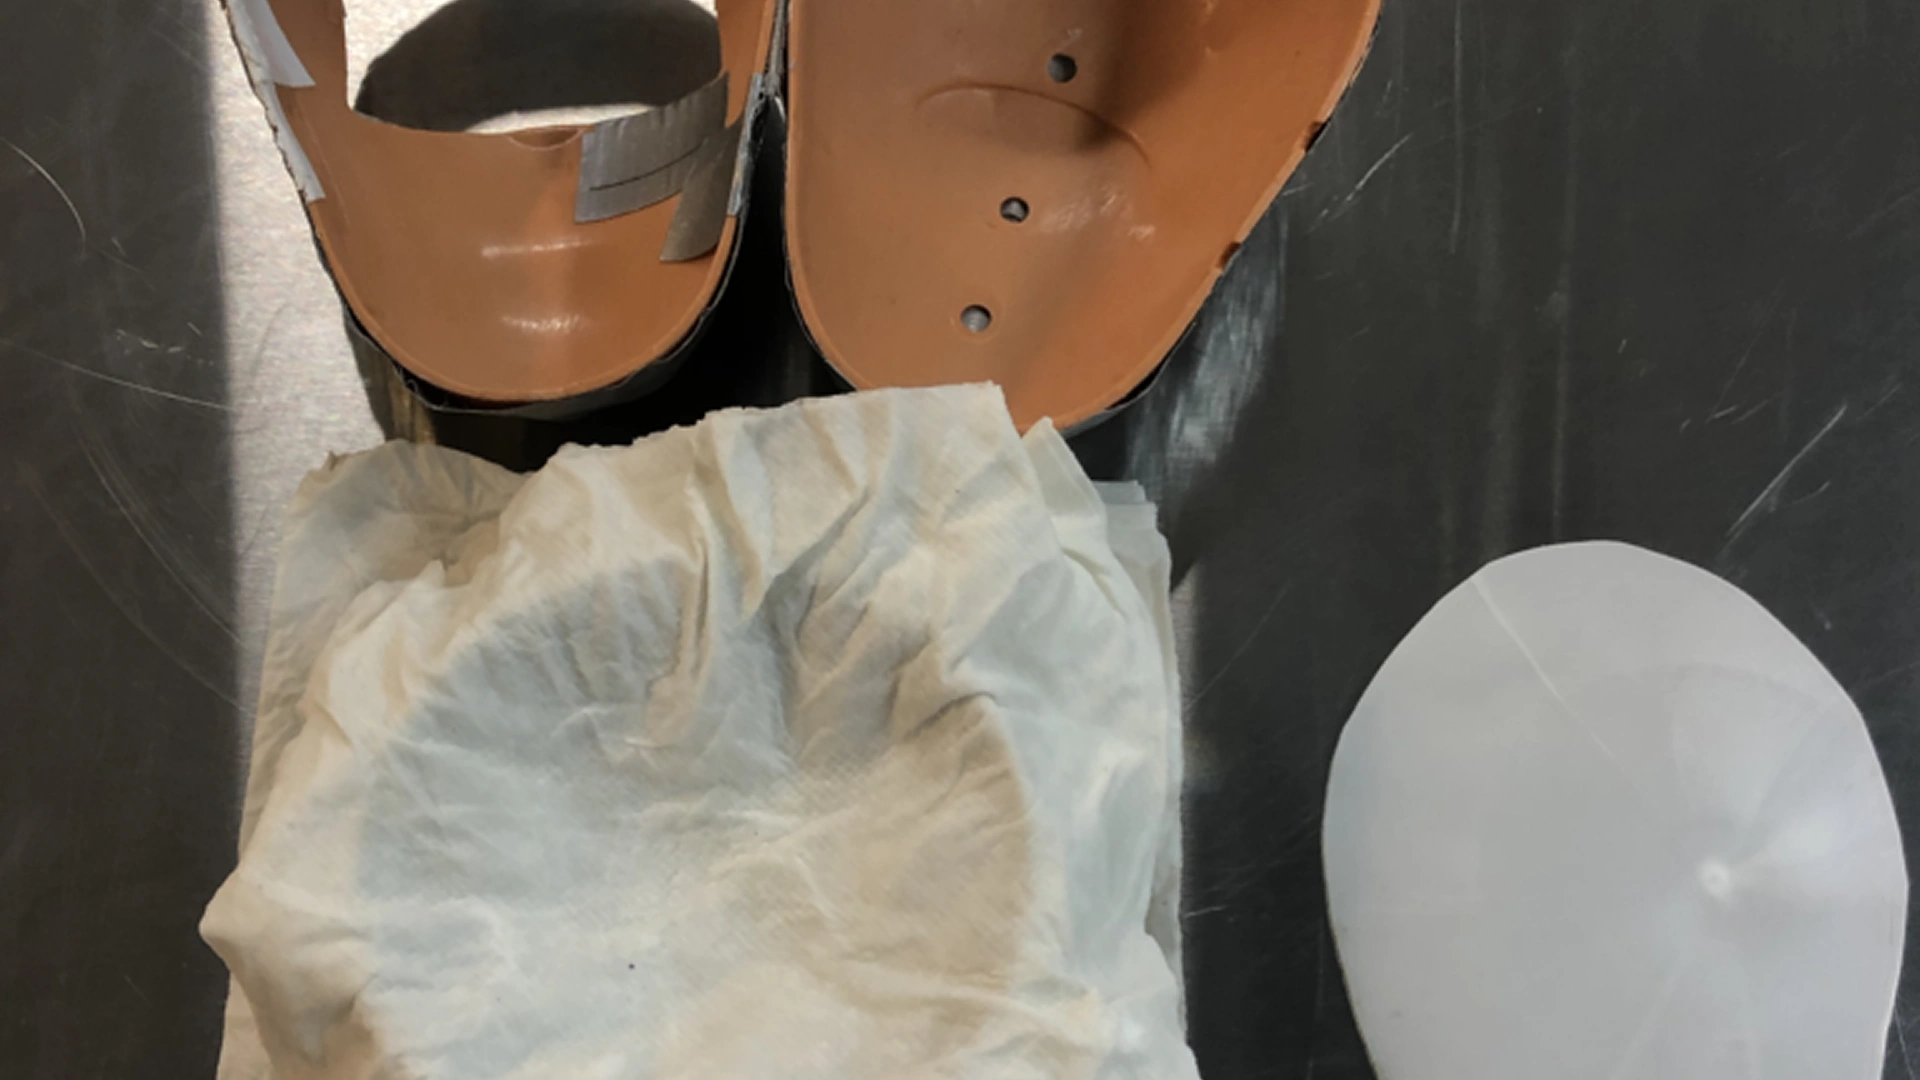
Step 1
Prepare your mise en place to start assembling. Lay some damp paper towels on the table then place a ring mold on top. Place more damp paper towels on top of the ring to have a base on which to set the mold firmly so that it does not move from its position.
Step 2
Place the base of the mold on top of the paper towel and the top (the part with the hole) next to it, as close together as possible. Lay down some plastic wrap to cover both molds. Measure the plastic stencil in the middle to make sure it fits well. Remove the stencil and set it aside.

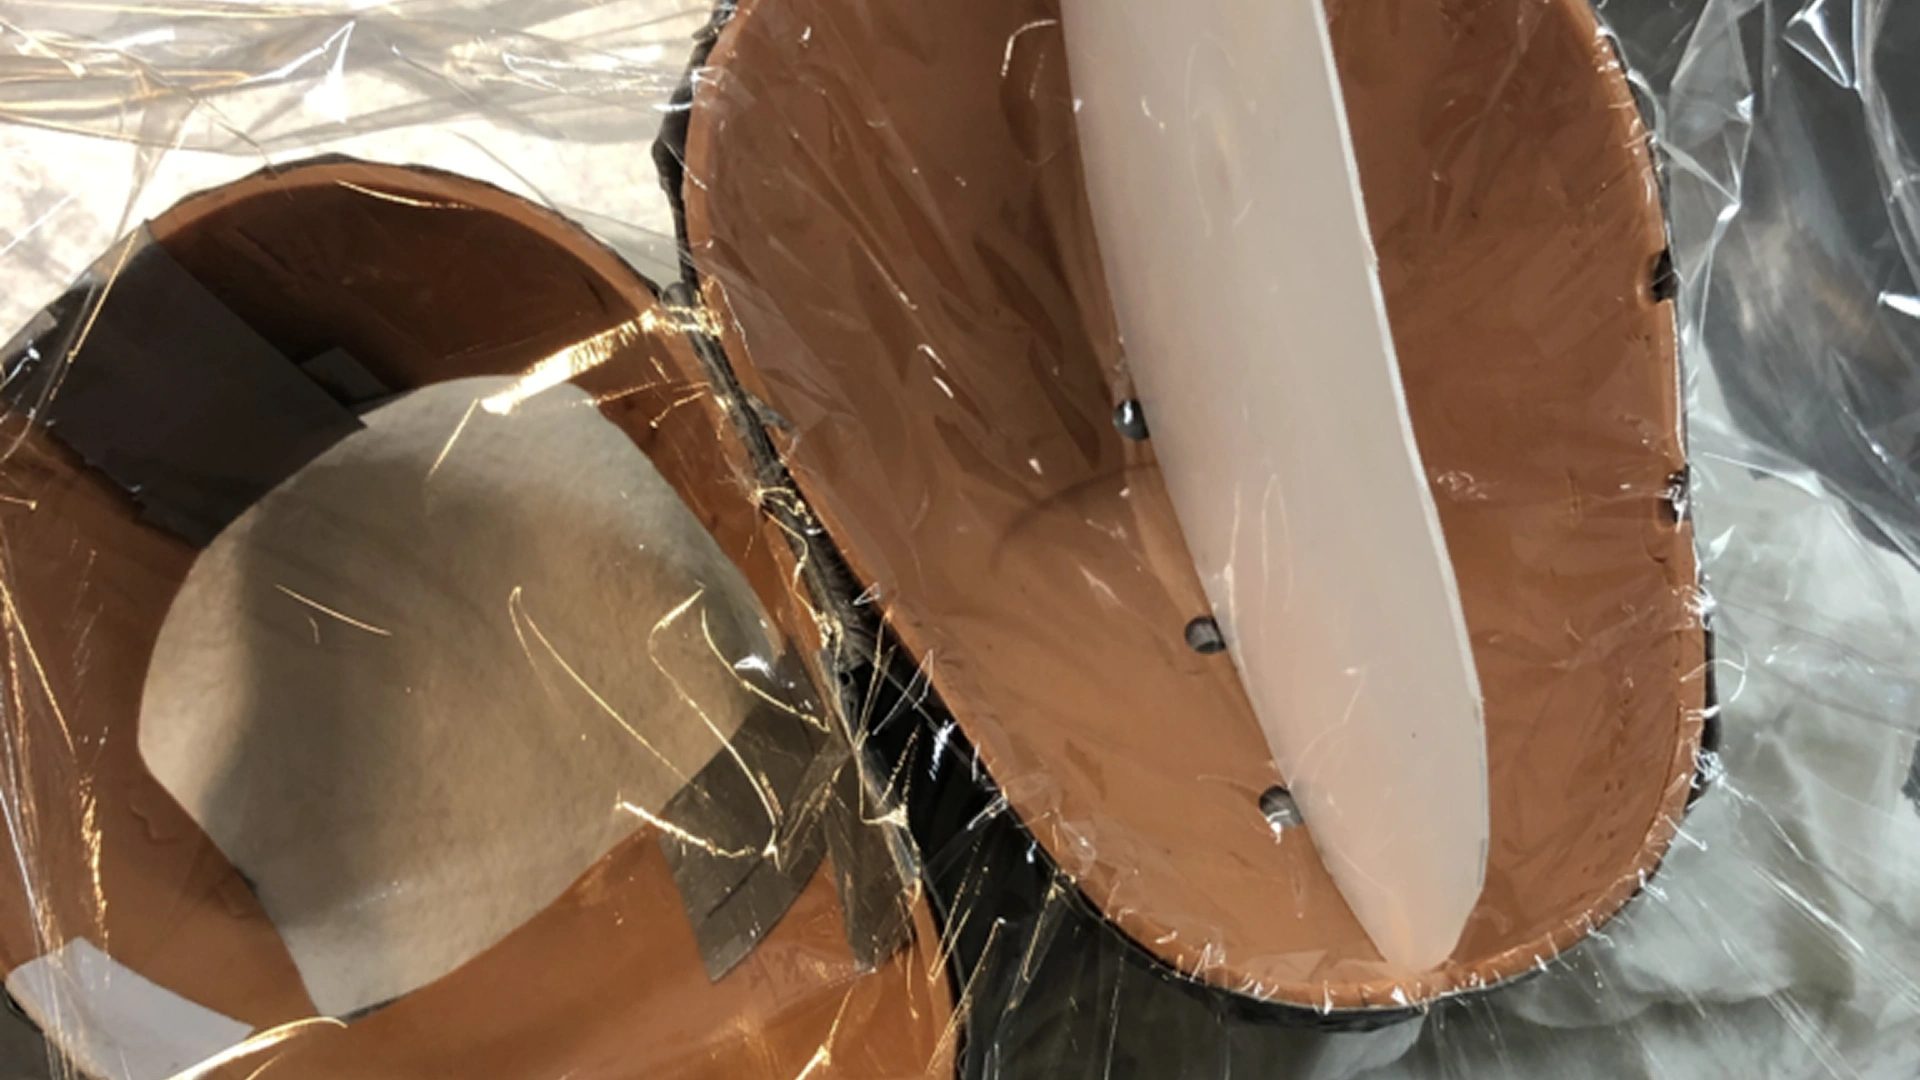
Step 3
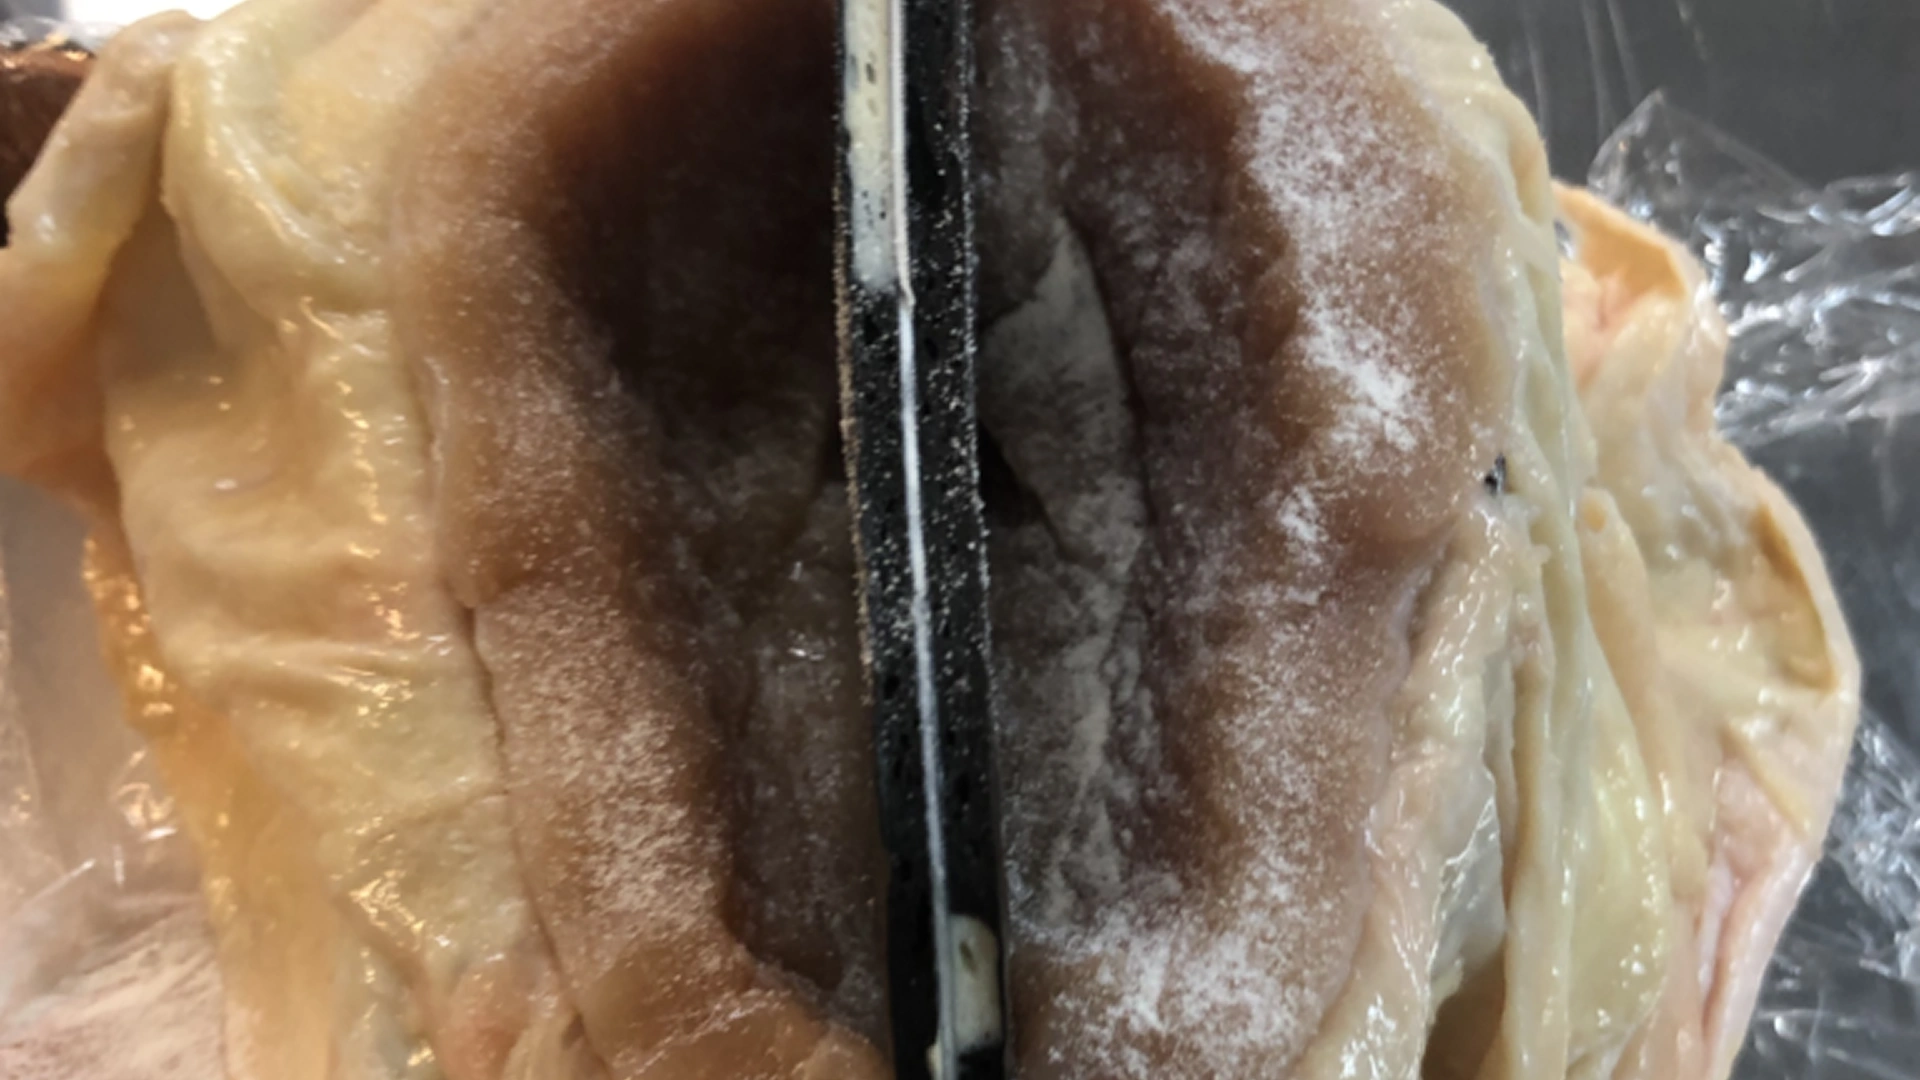
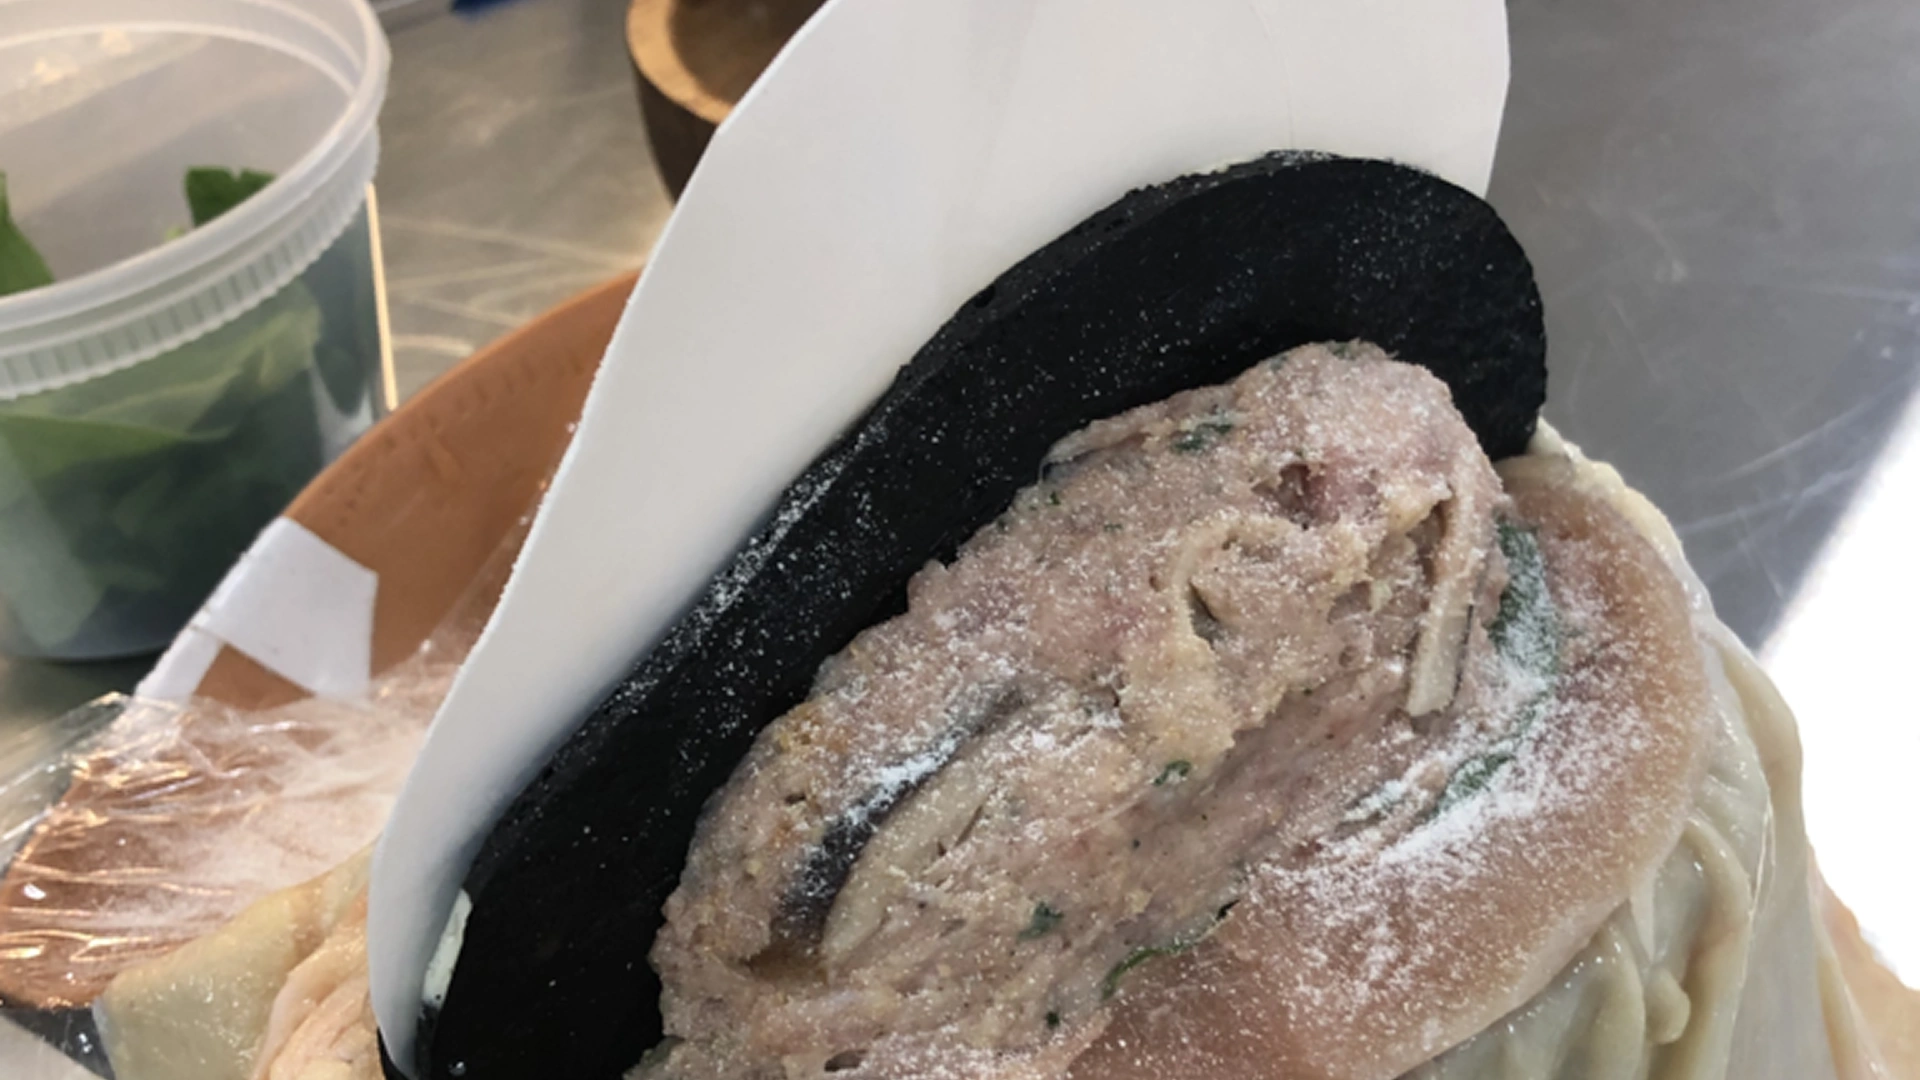
Carefully place the chicken skin on top of the mold. Be sure to cover all the spaces and avoid wrinkles. There should be enough skin to cover both halves of the mold. Spray some cooking spray on both sides of the stencil. Add one piece of the inlay on each side of the stencil, making sure they fit the form of the stencil perfectly. Place the stencil in the middle of the mold standing up directly in the middle.
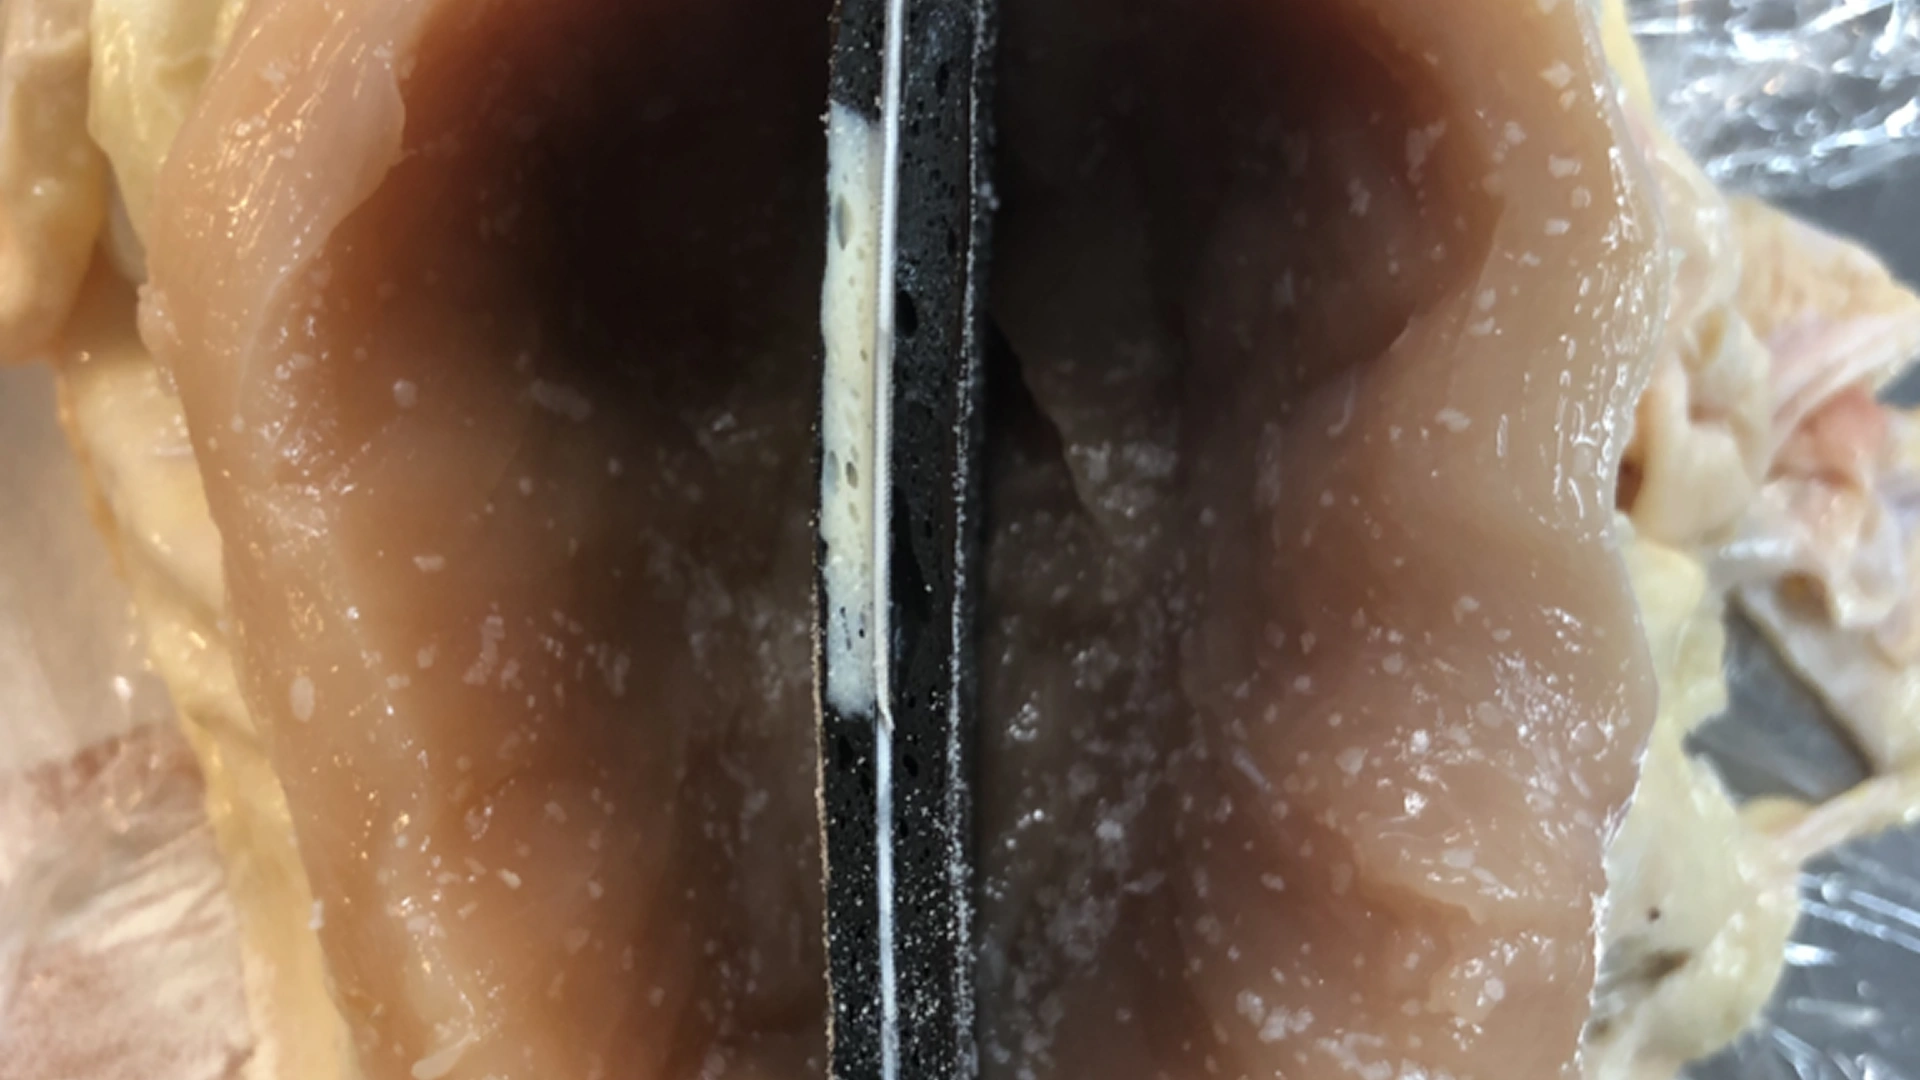
Step 4
Place enough chicken breast on the sides to cover the bottom of the mold entirely.
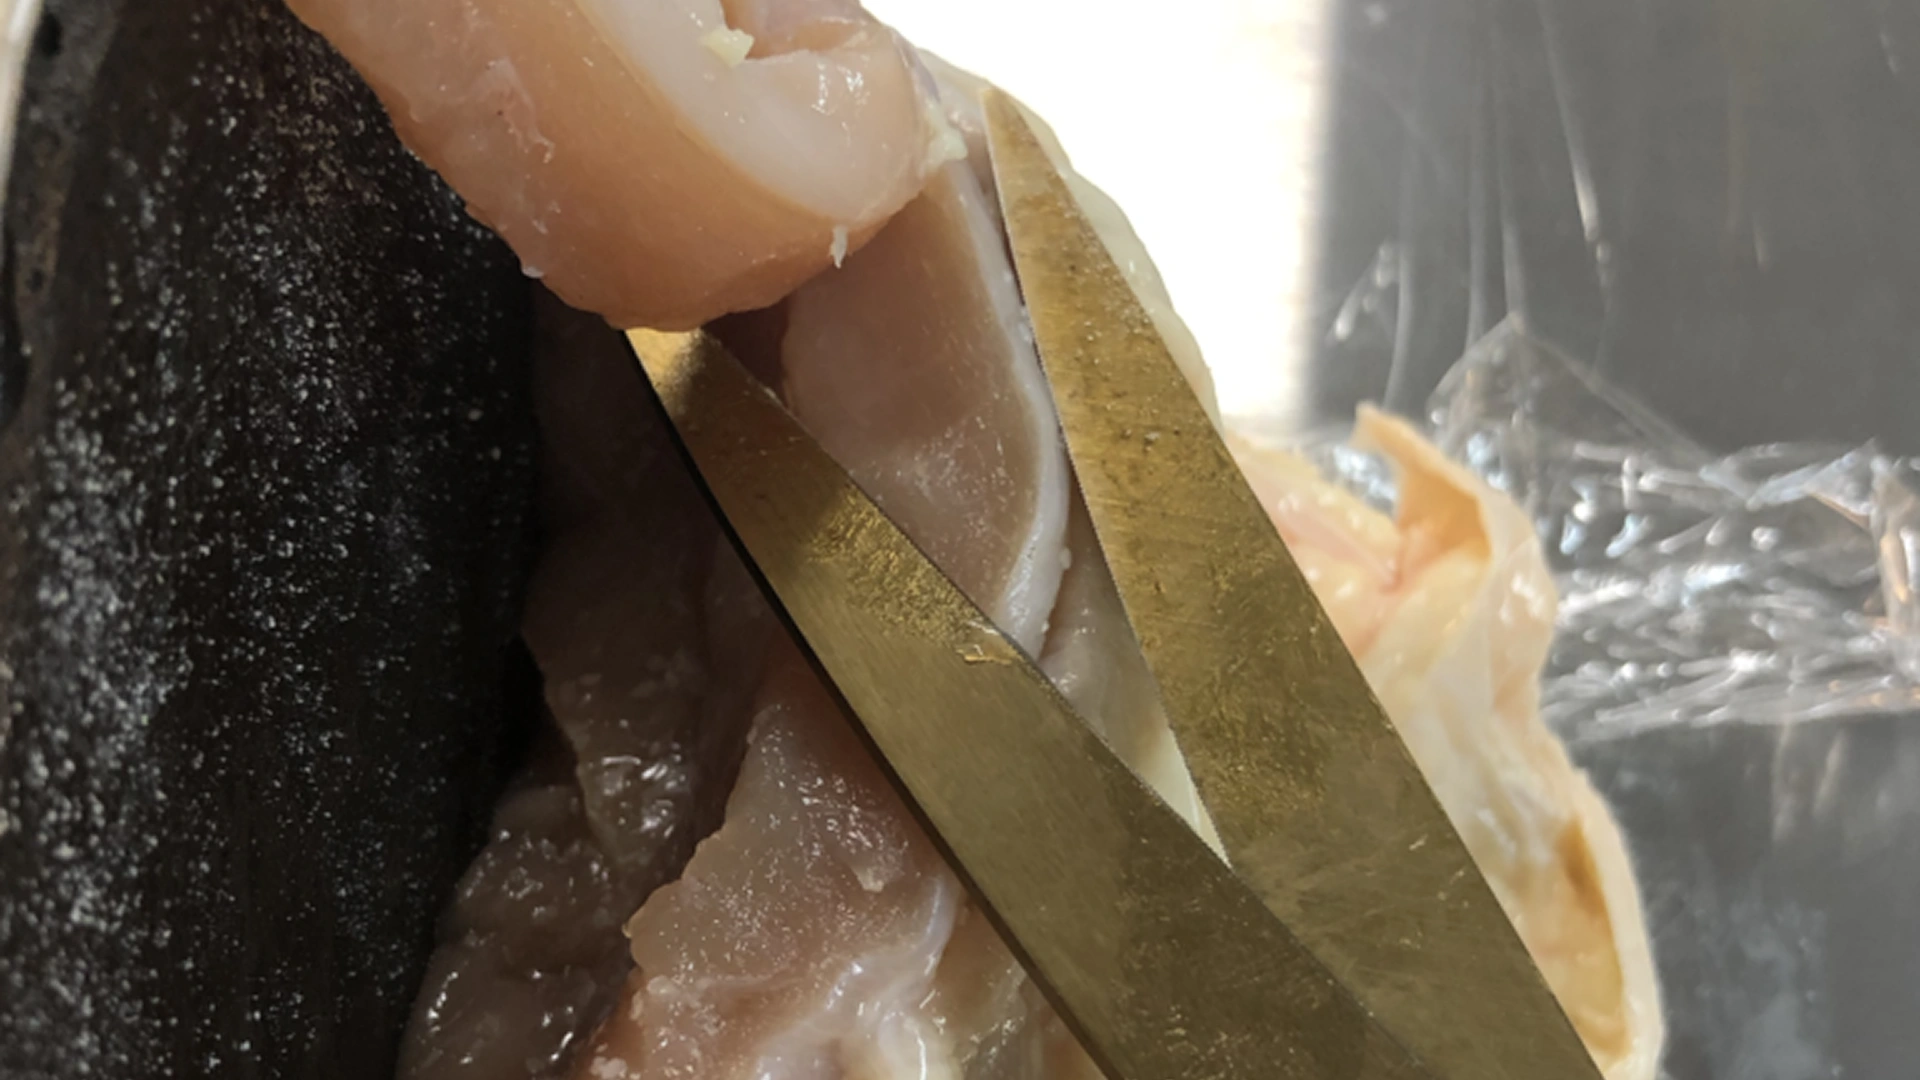
Step 5
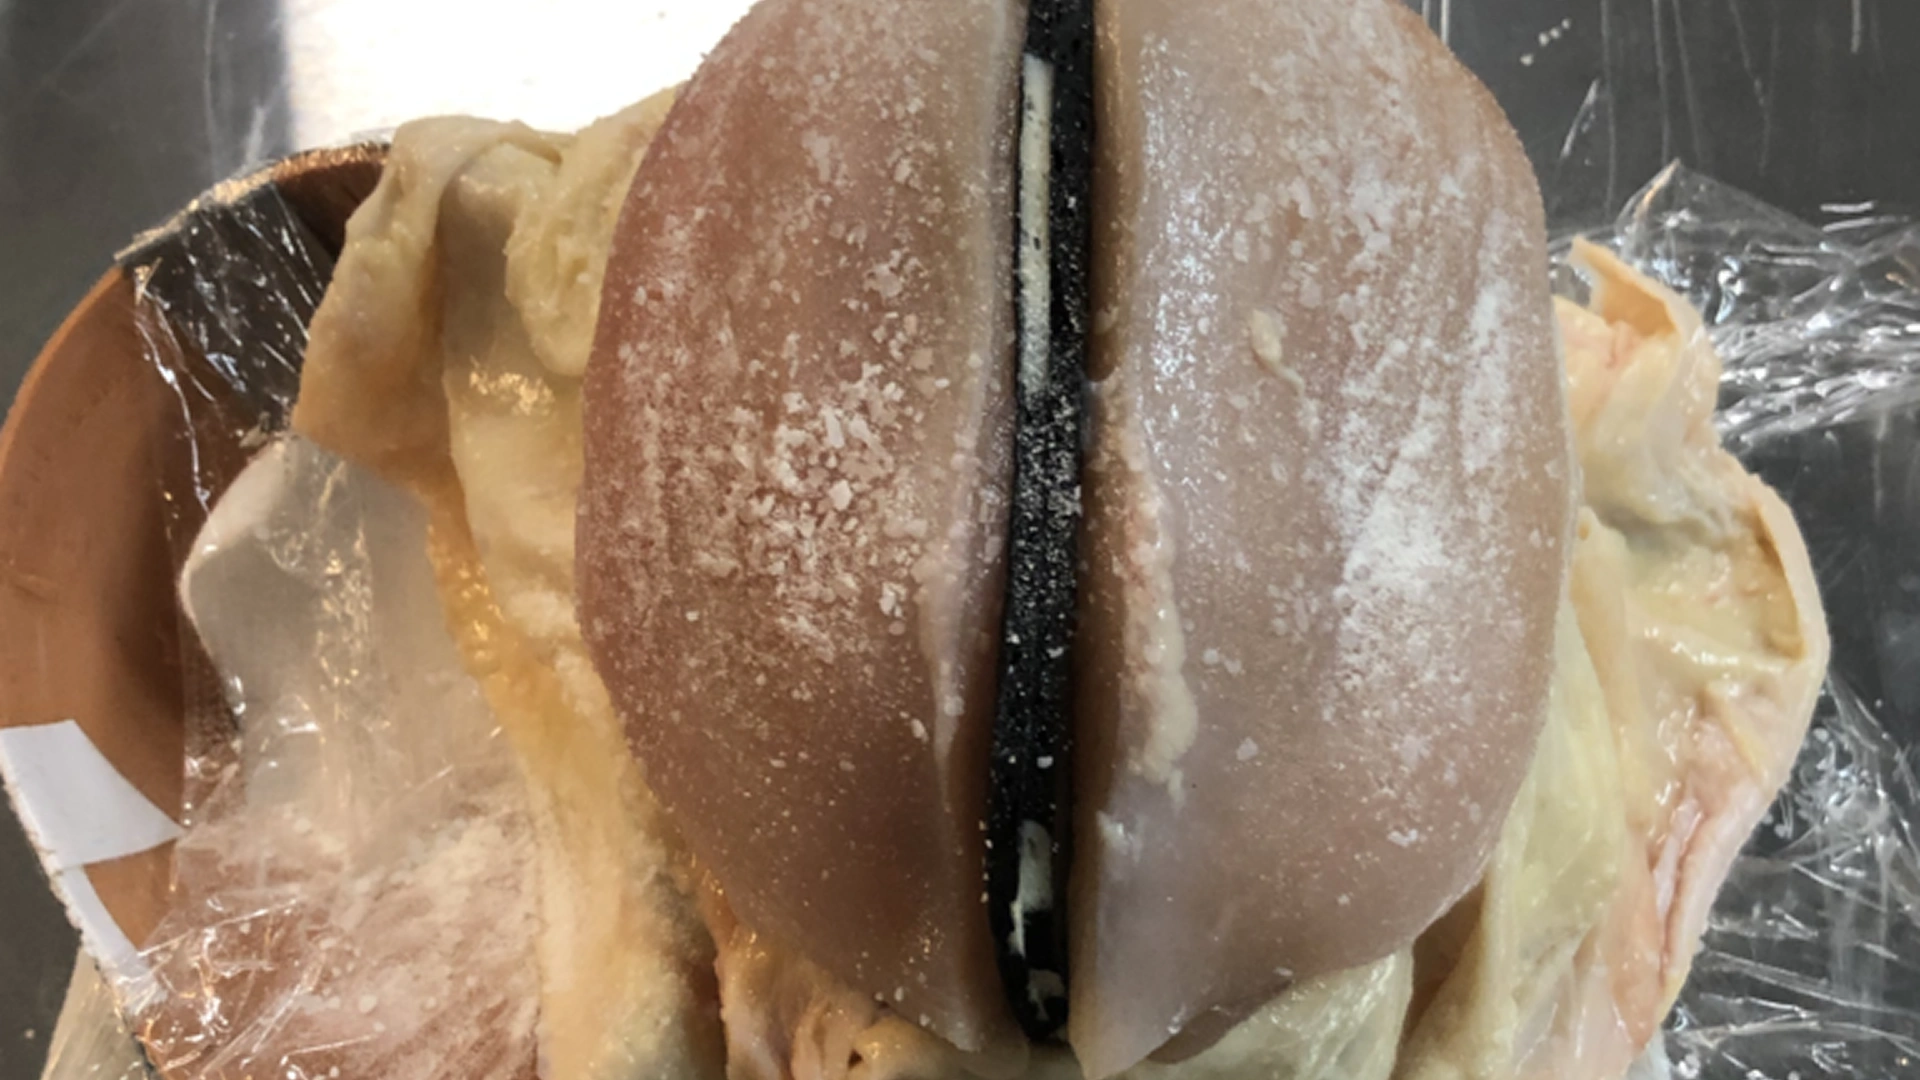
Use scissors to cut the excess of the chicken breast to ensure it fits the mold correctly at the top and so it is flush with the first half of the mold.
Step 6
Carefully add some transglutaminase, making sure you don't add too much to avoid clumps at the end of the process.
Step 7
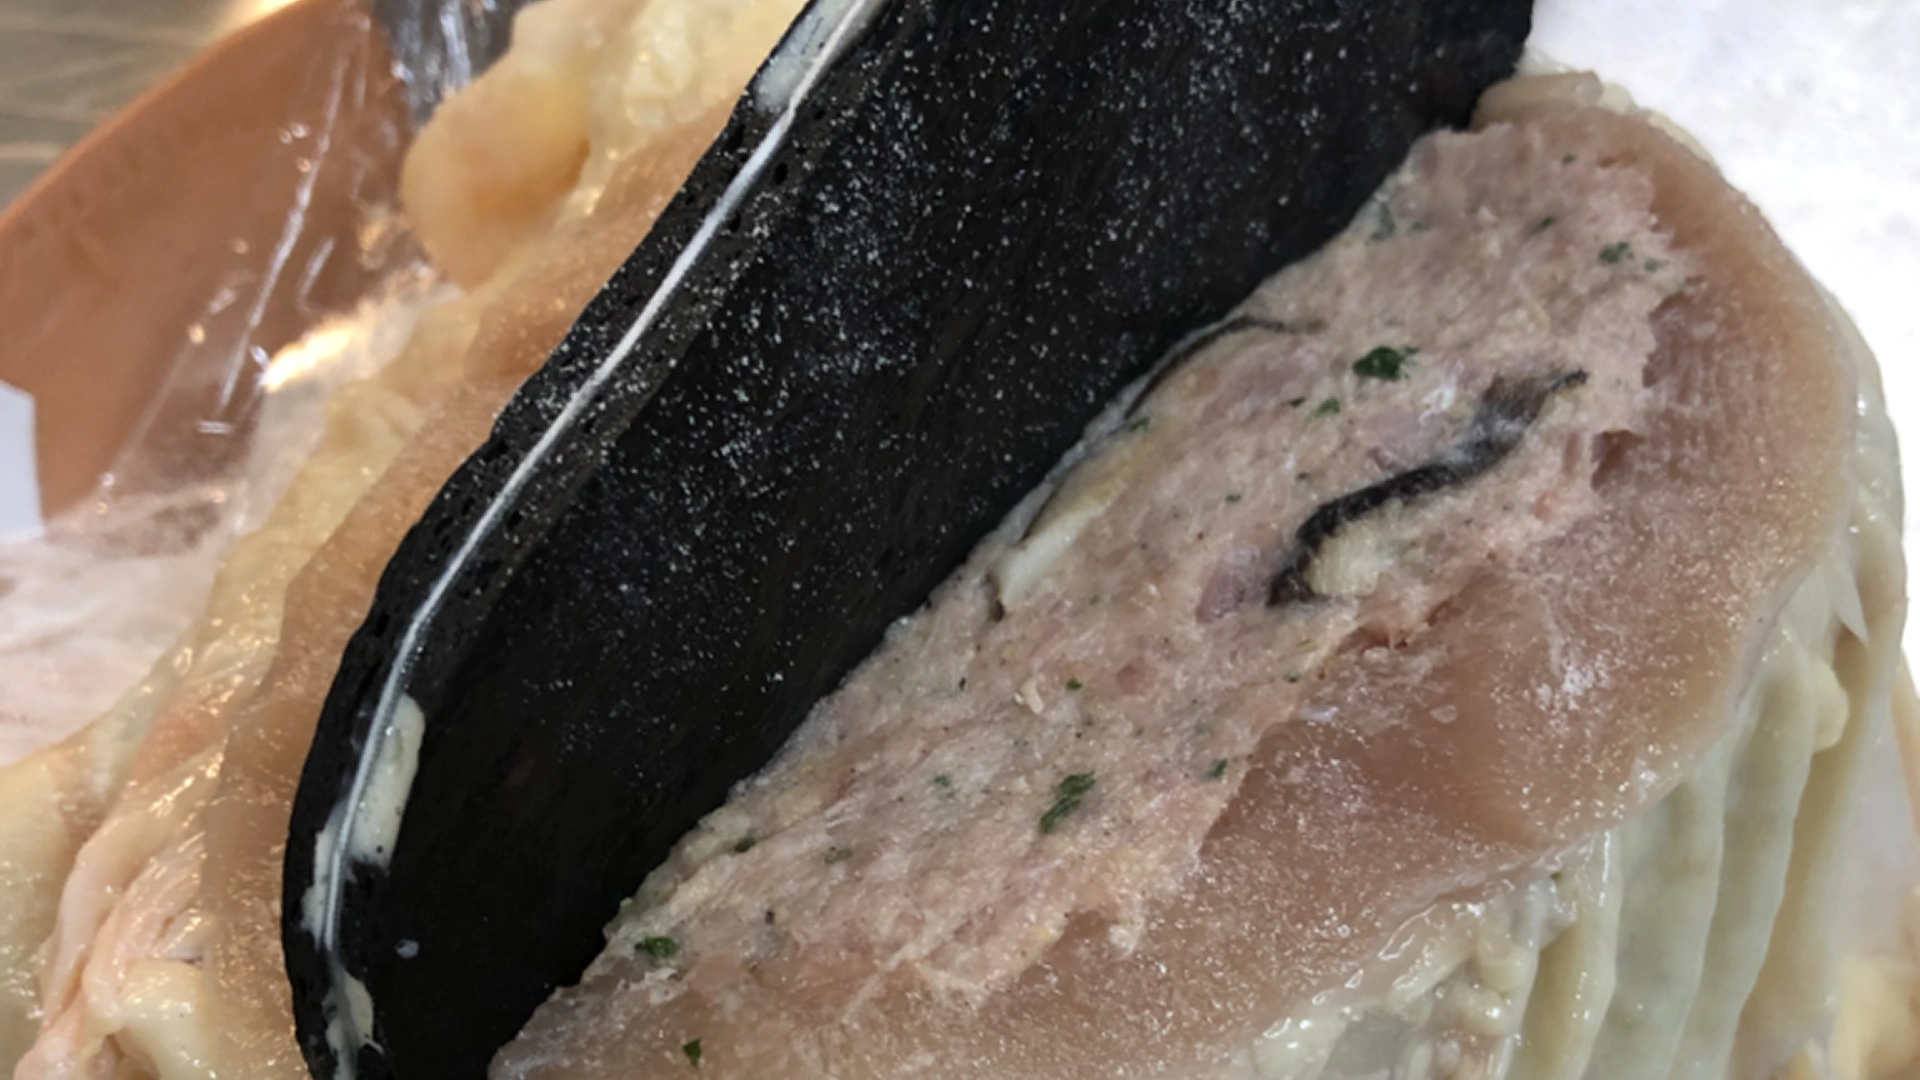
Pipe the stuffing farce to fill the empty spaces on both sides.
Use an offset spatula to spread and press into the mold evenly. Sprinkle more transglutaminase on top.
Step 8
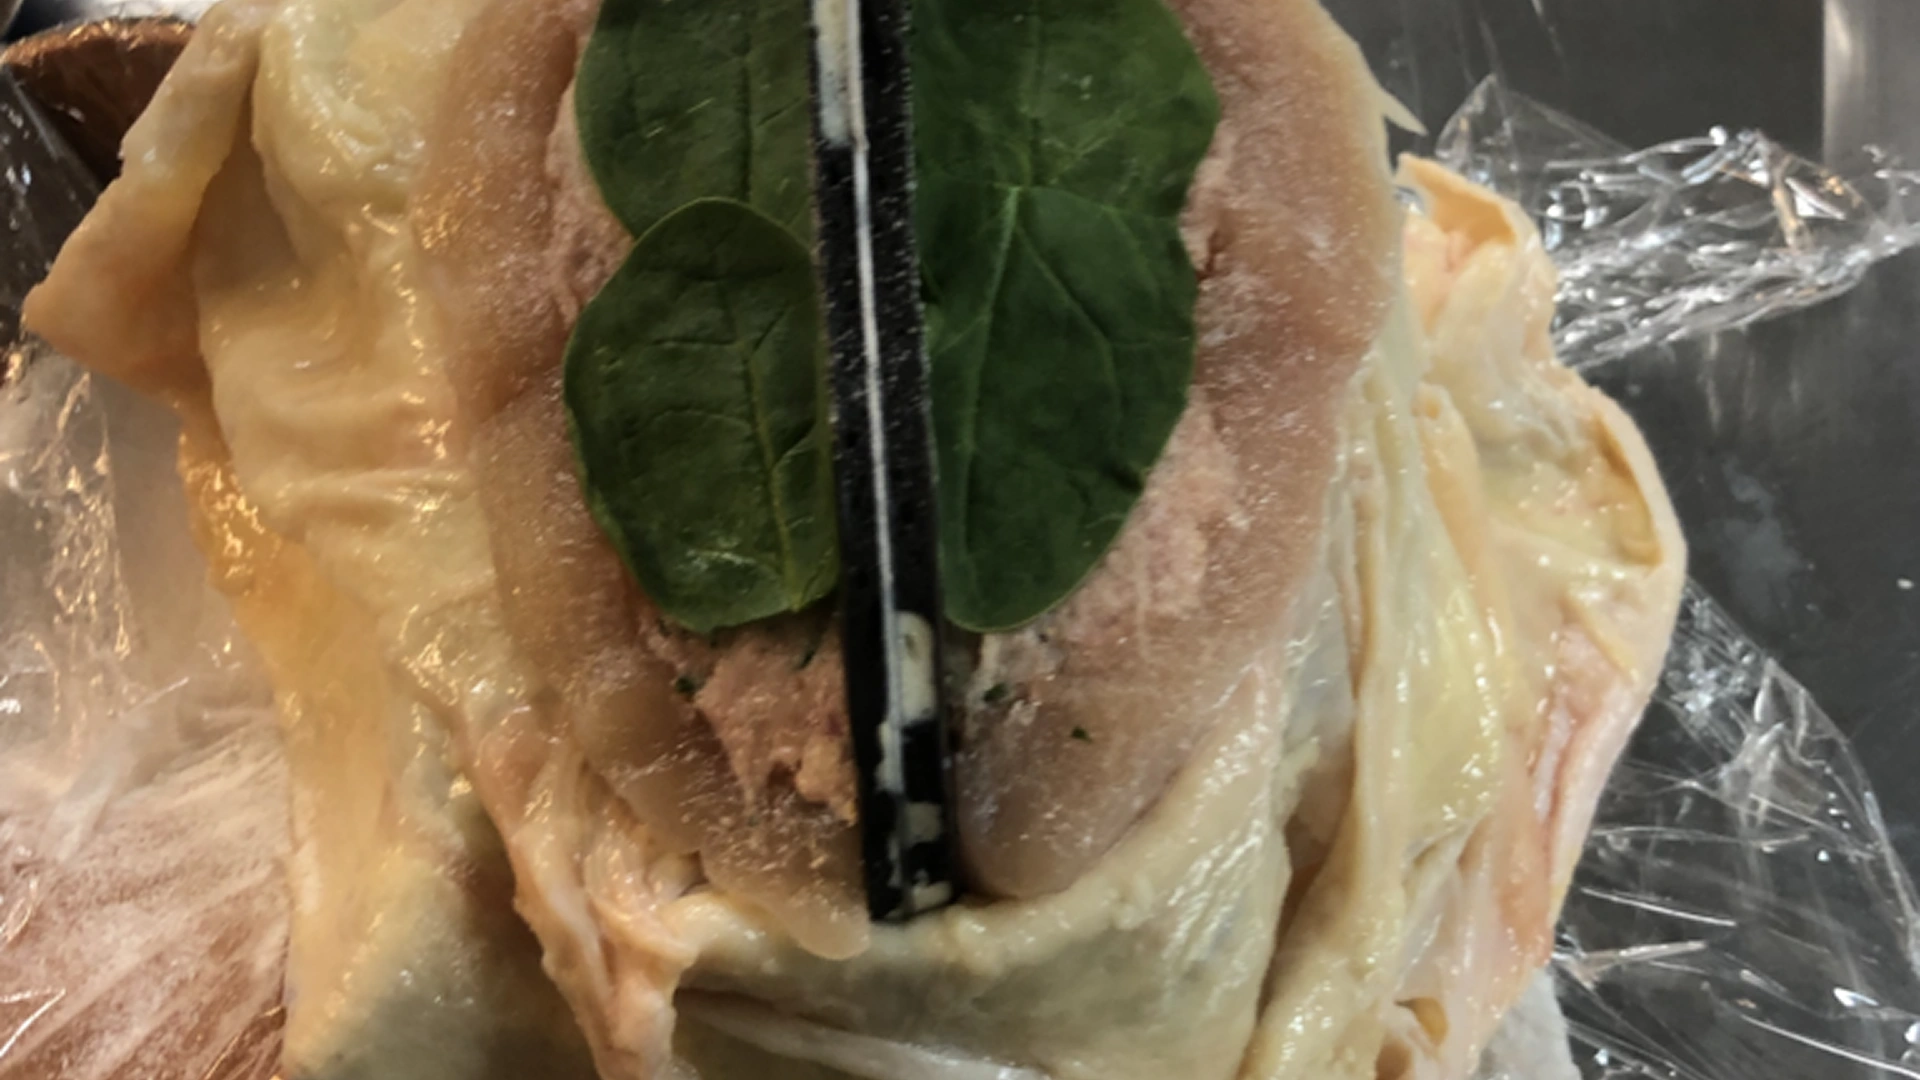
Place two spinach leaves on each side, covering the stuffing farce.
Step 9
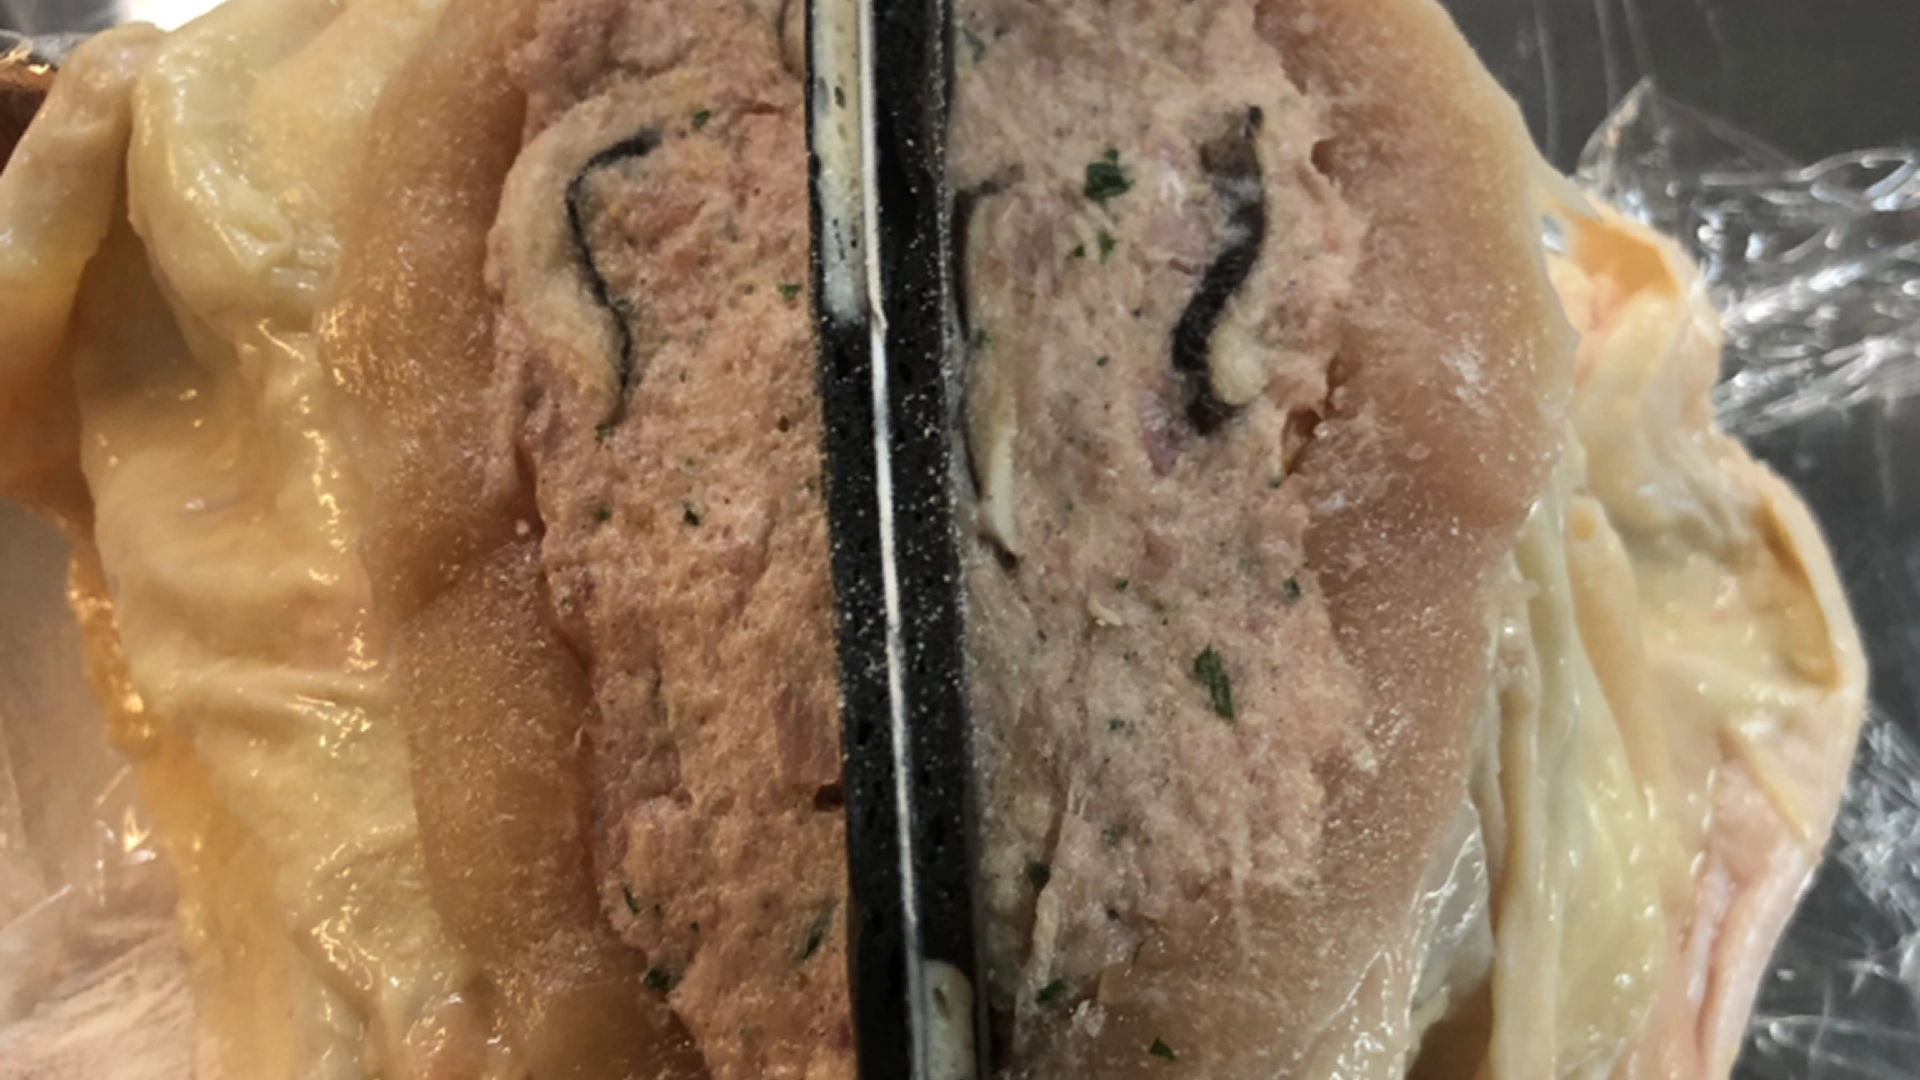
Pipe more stuffing farce to follow the form of a chicken breast. Sprinkle more transglutaminase, being careful to not add too much.
Step 10
Using pliers, carefully remove the stencil from the middle of the mold once there is enough mousse on each side to hold it in place after the stencil is removed.
Step 11
Cover the farce with the remaining chicken breast while still fitting within the mold. Sprinkle some transglutaminase so that the skin of the chicken sticks to the breast. You may need to cut away excess chicken or scrape away excess mousse. It is important that the mold can be closed.
Step 12
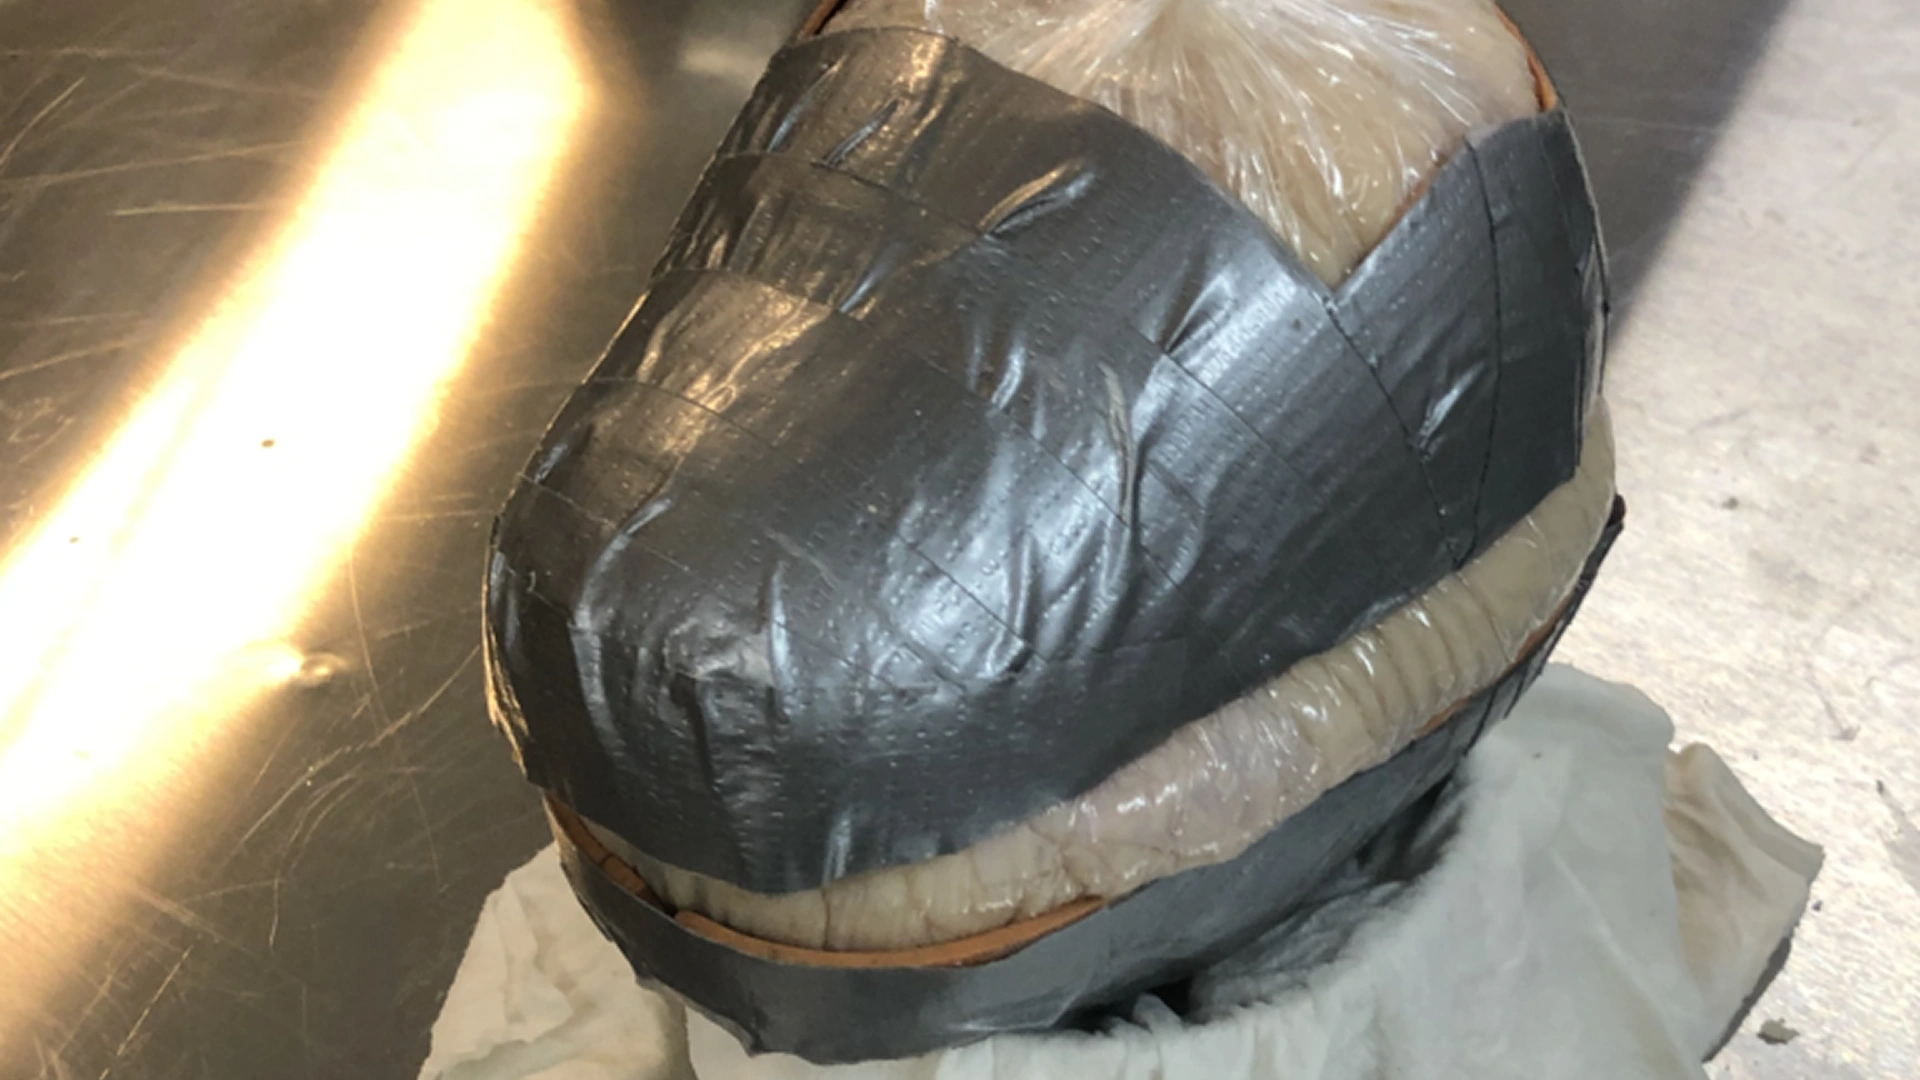
Carefully cover the chicken breasts with the skin followed by plastic wrap. Twist the wrap so that all contents fit neatly inside the mold.
Place the other half of the mold on top to close the entire preparation.
Using the opening in the mold, pull the plastic wrap through and tighten it as much as you can, pressing the mold gently down to make sure it will stay in position. Tie the gathered plastic wrap with butcher's twine.
Step 13
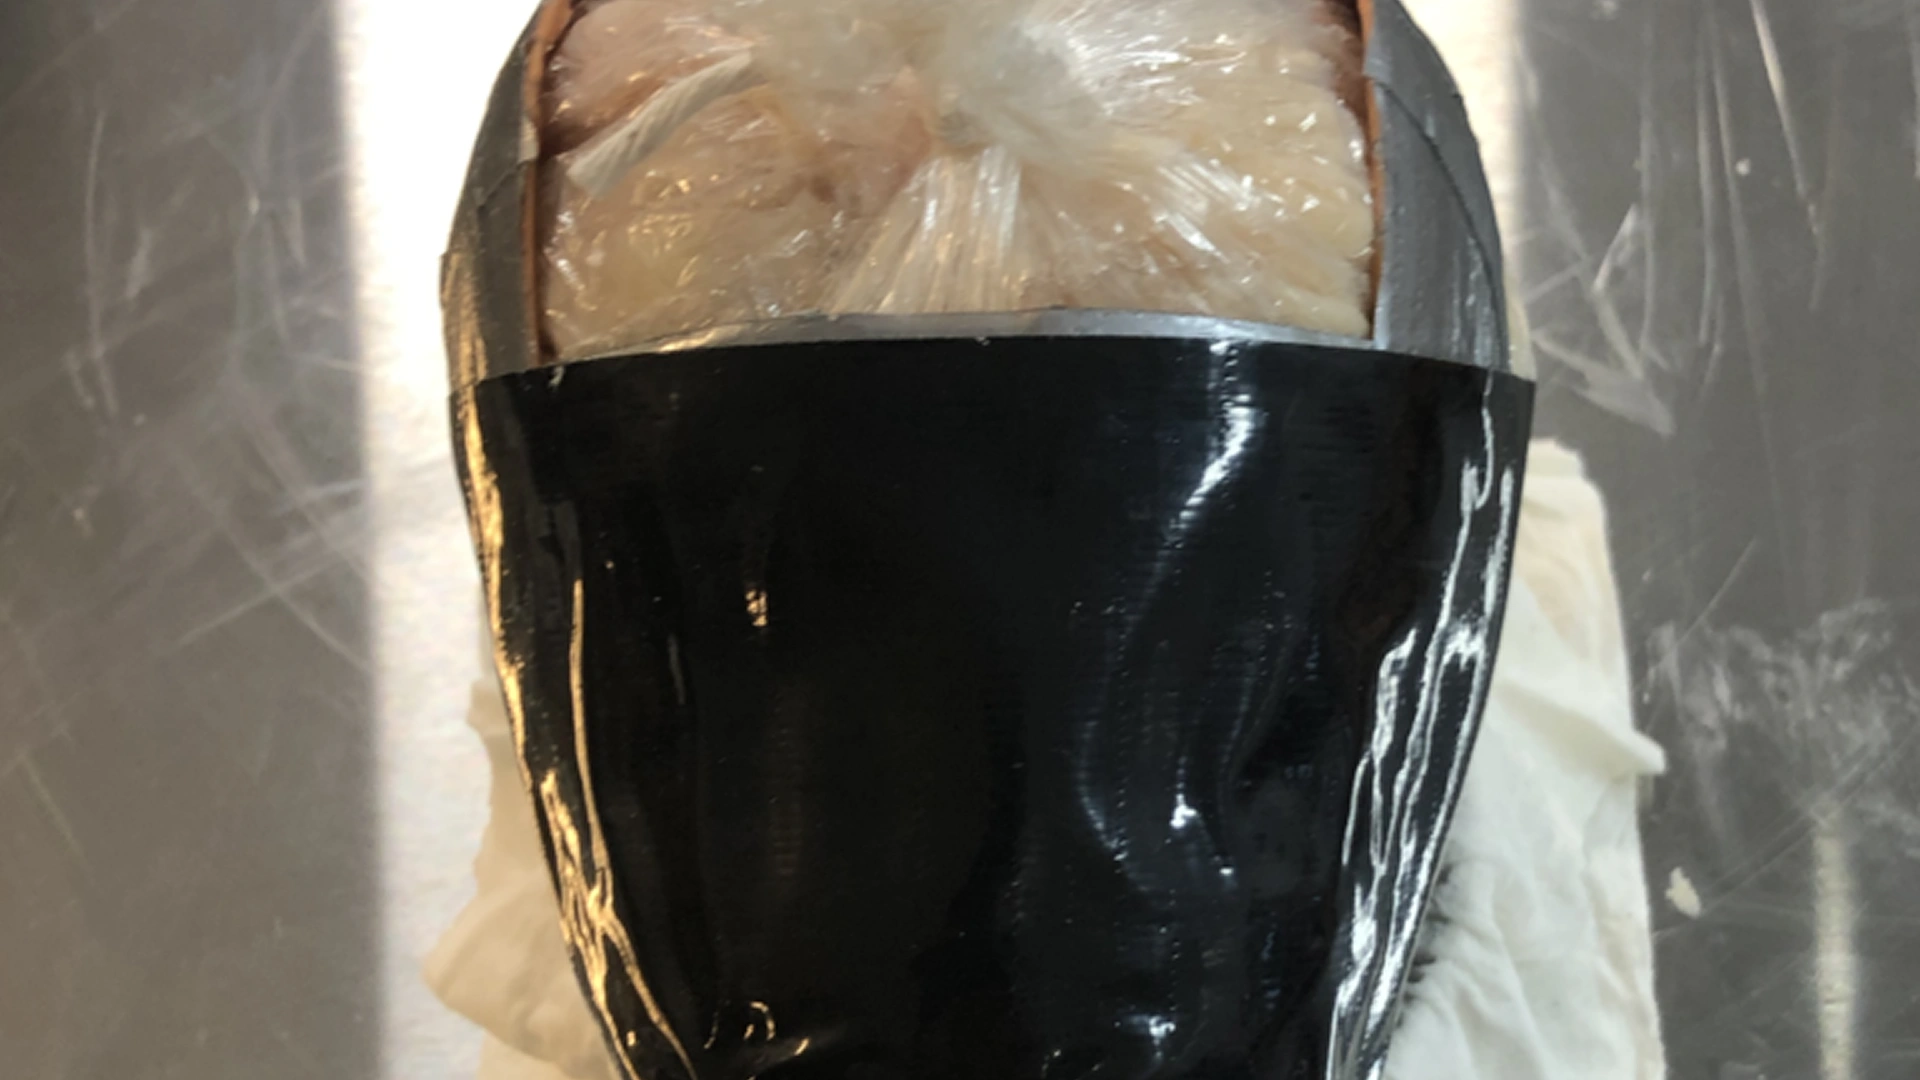
Gently wrap the mold with duct tape for more stability.
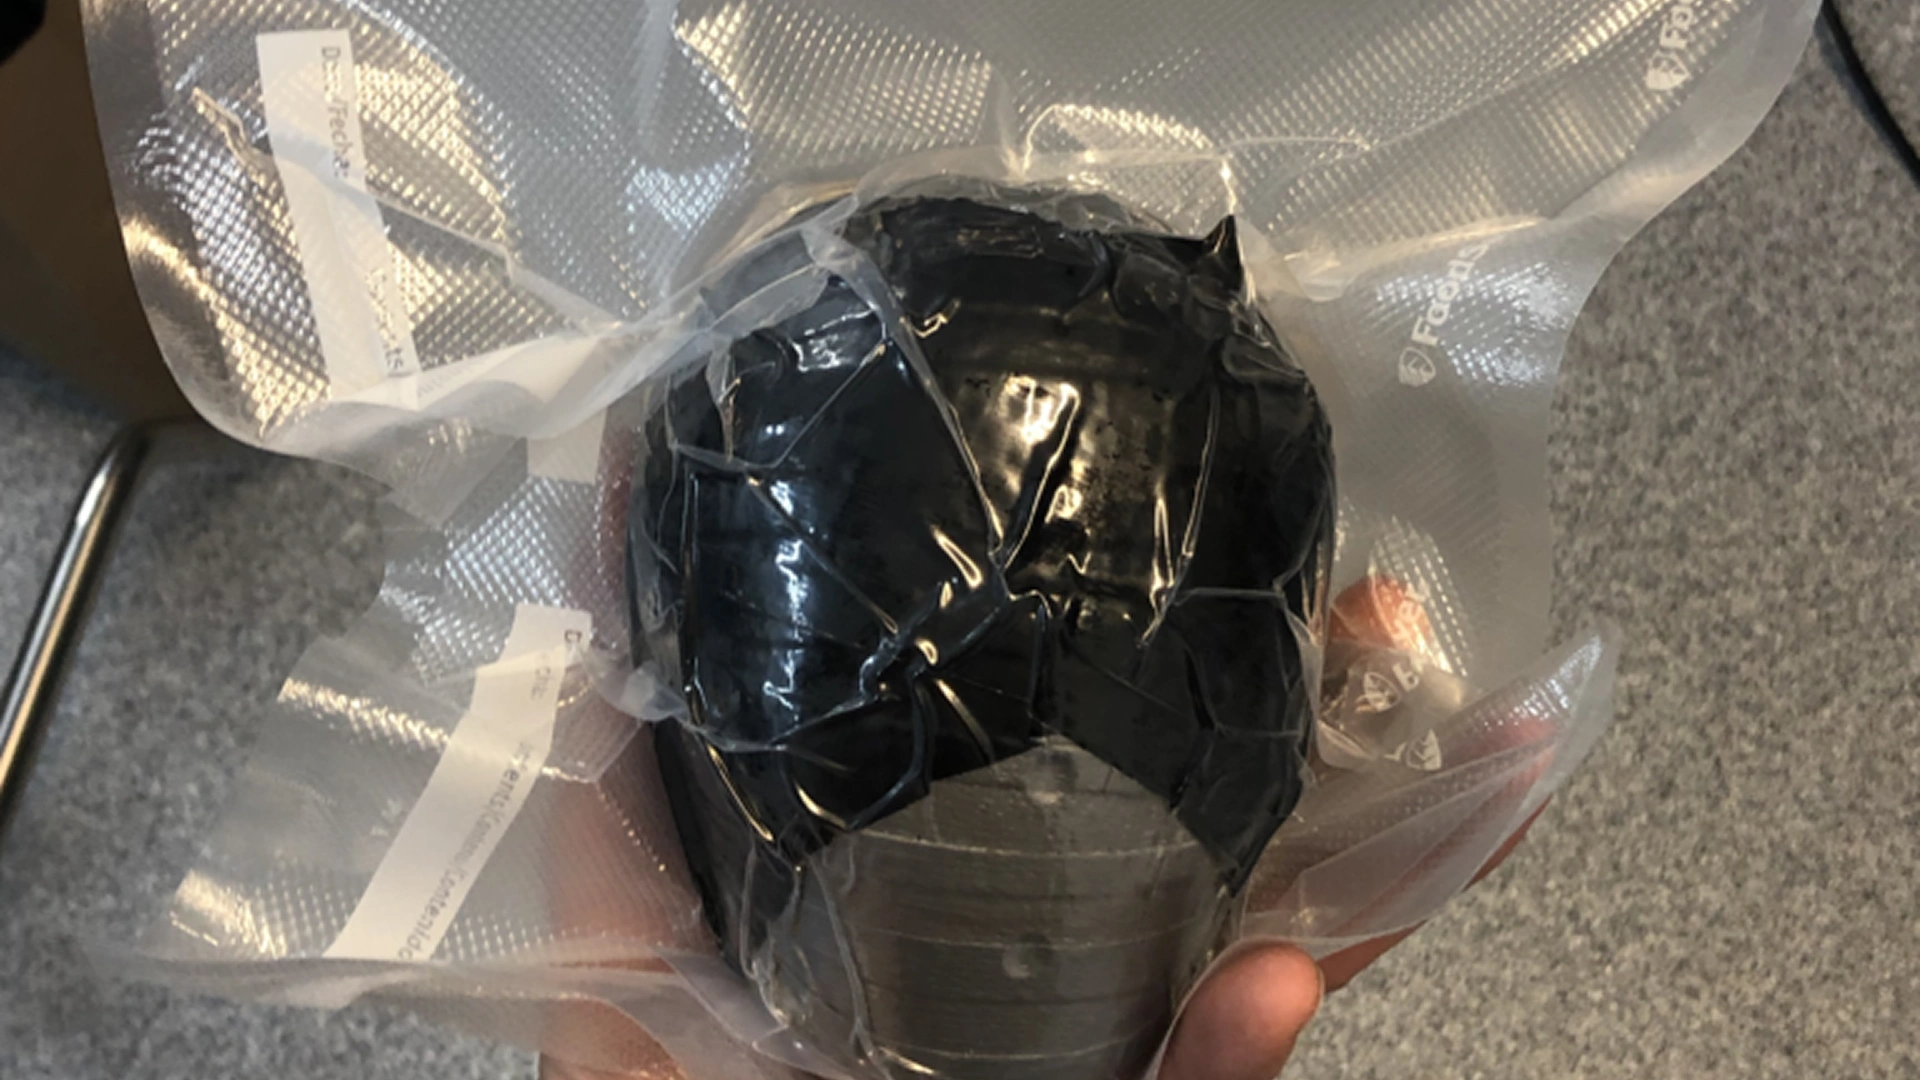
Step 14
Vacuum pack the mold using a FoodSaver®, NOT a commercial vacuum sealer, as it will distort the shape with too high of PSI. Check that the sealing is perfect.
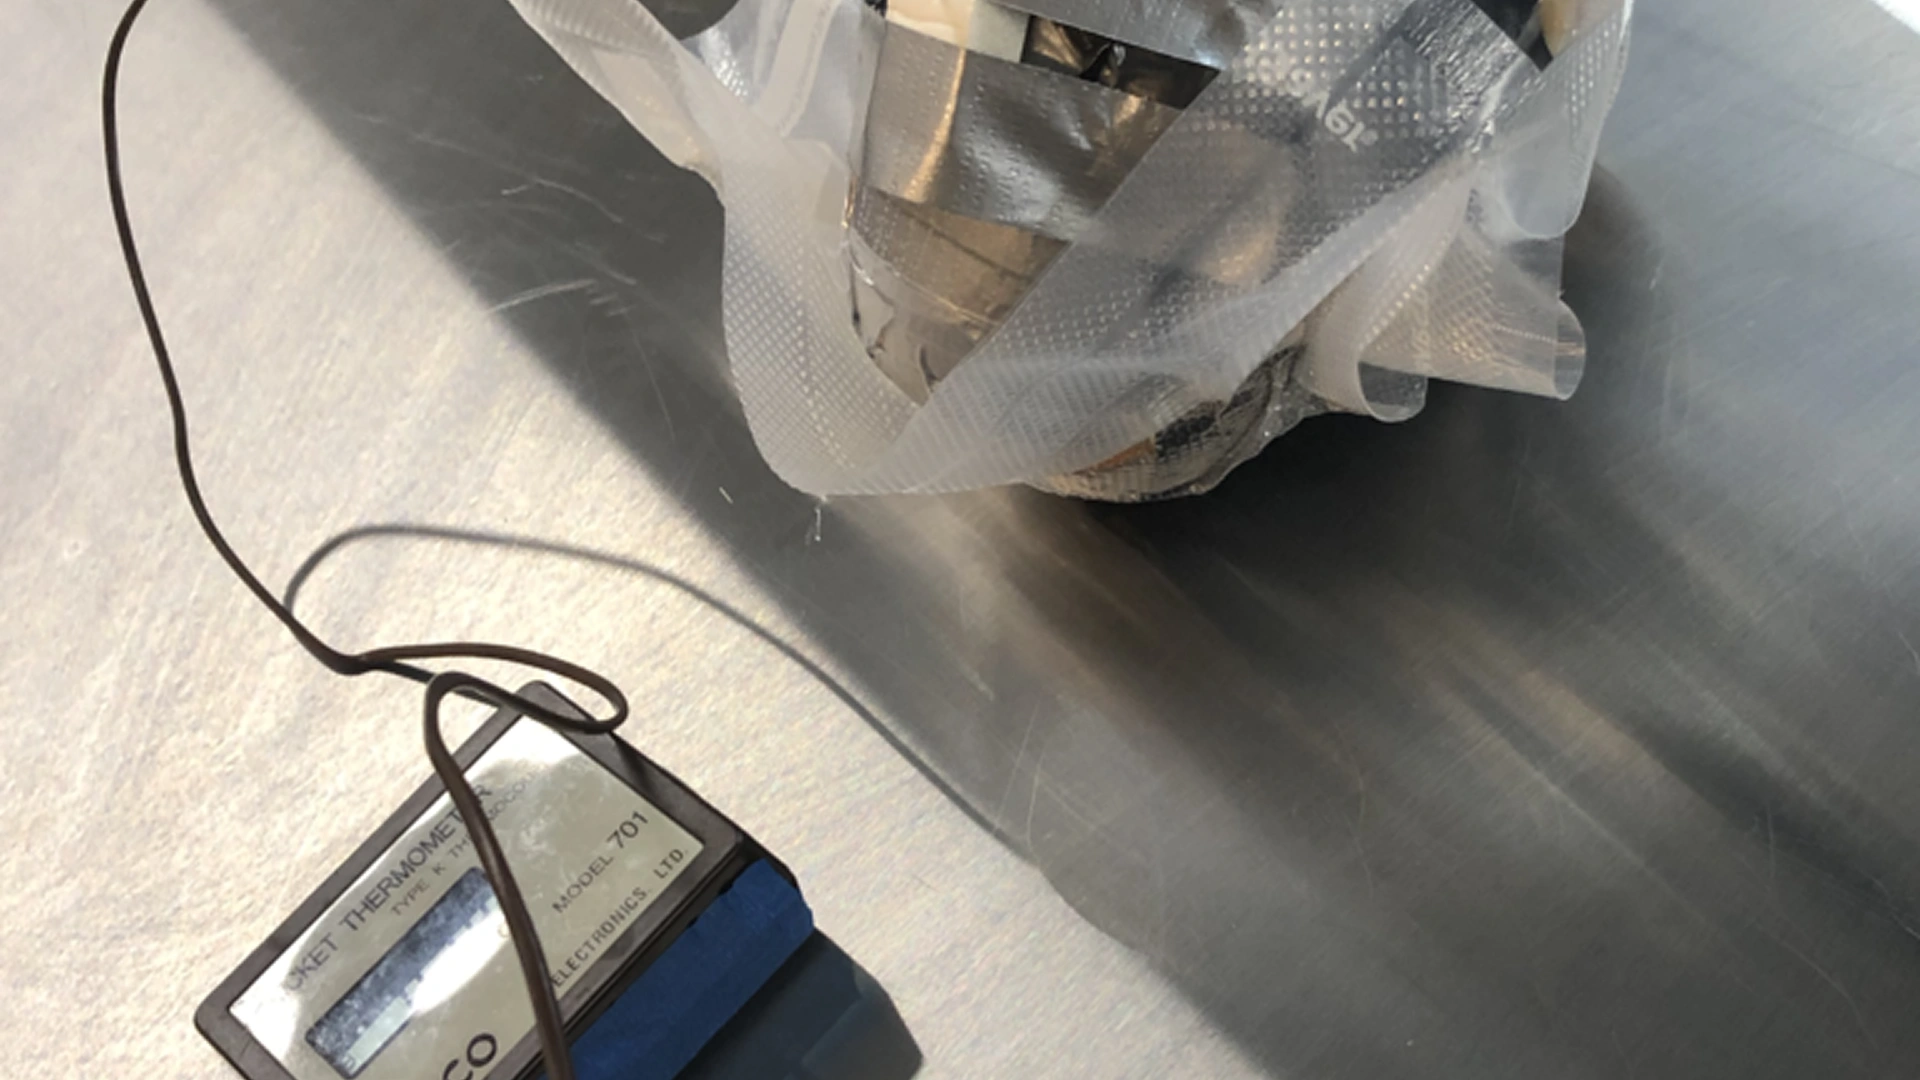
Step 15
Insert a probe through the plastic until you reach the center of the chicken. Cook the chicken in a preheated water bath at 68 degrees C for 1 hour and 30 minutes. Remove from a water bath when the internal temperature reaches 133 degrees F. The chicken will continue to carry over the cook. Next, carefully unwrap the chicken from the mold and the plastic wrap. Pat dry. Place the chicken in a preheated 350-degree deep fryer. Let the chicken brown nicely and remove it from the deep fryer.
Let the chicken rest, then proceed to plate directions.